 Save
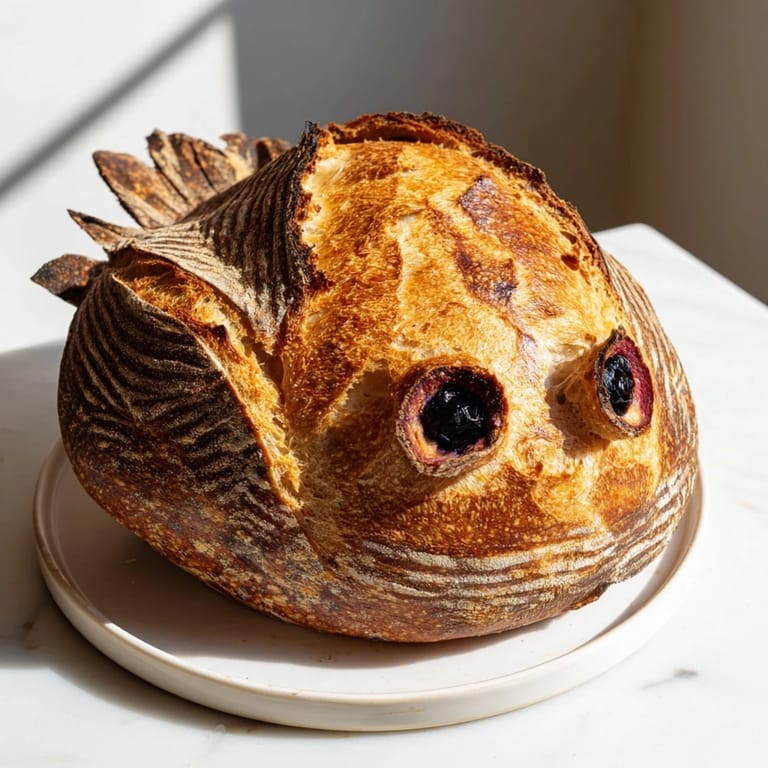
Save One November afternoon, my sister called asking if I could bring something spectacular to Thanksgiving dinner, something that would make everyone stop and stare. I hung up and stood in my kitchen thinking about all the bread I'd made that year, and suddenly I pictured it: a golden, crusty turkey made entirely of sourdough, sitting proud on the table like it had just walked out of the oven. That night I started sketching shapes on flour dust and testing how a loaf could become a bird. The magic happens when you let time do the work, when those long hours of fermentation turn simple flour and water into something that tastes tangy and complex and feels like an accomplishment.
I'll never forget pulling that first turkey loaf from the oven while my family hovered in the kitchen, the steam rising and the kitchen smelling like nutty caramel and fermentation. My dad actually gasped, and then everyone wanted to know if it was too pretty to eat. We sliced into it five minutes later, still warm, and the crumb was so open and tender that butter practically melted into it. That bread became the centerpiece and the star, which honestly never happens.
Ingredients
- Bread flour: Use a high-protein flour if you can find it because it gives you better structure and helps create those beautiful open crumbs and a shattered crust.
- Water: Room temperature water lets your dough relax and ferment evenly, making everything easier to work with and tastier in the end.
- Active sourdough starter: At 100% hydration, this should be bubbly and alive, peaked or just past peak, so it has real oomph to lift your dough through fermentation.
- Fine sea salt: Don't skip it or cut back; salt strengthens gluten and actually makes your bread taste more flavorful, not salty.
- Black olives or peppercorns: These become the bird's eyes and add a funny personality to your turkey, plus they won't burn in the oven.
- Red bell pepper or dough: The wattle is pure decoration and fun, so choose whatever appeals to you visually without worrying too much about flavor.
- Seeds for topping: Poppy, sesame, or flax seeds scattered over your feathers make the whole thing look more intricate and catch light beautifully.
Tired of Takeout? 🥡
Get 10 meals you can make faster than delivery arrives. Seriously.
One email. No spam. Unsubscribe anytime.
Instructions
- Start with patience and rest:
- Mix your flour and water, then step back and let them hang out together for 30 to 45 minutes without doing anything. This autolyse period lets the flour fully hydrate and actually starts developing gluten without you wrestling with the dough.
- Bring everything together:
- Stir in your starter and salt until you can't see any dry flour, then let the dough rest for 15 minutes before you start the real work. This short rest helps the salt dissolve and won't shock your fermentation.
- Stretch and fold your way to strength:
- Over the next 2 hours, grab one side of the dough, stretch it up and fold it over itself, then rotate the bowl and repeat from all four sides. Do this whole sequence 3 or 4 times, every 30 minutes, and watch how the dough transforms from shaggy to smooth and elastic.
- Let bulk fermentation happen:
- Cover your bowl and let it sit at room temperature, somewhere around 70 to 74 degrees Fahrenheit, for 5 to 7 hours until it's visibly doubled and jiggles when you shake the bowl gently. You're looking for bubbles visible on top and a dough that feels alive and airy.
- Shape your turkey with intention:
- Turn your dough onto a lightly floured surface and gently divide it into pieces: one large oval for the body, a small round for the head, and several teardrop shapes for tail feathers and wings. Handle it like you're playing with clay, being playful but careful not to deflate it.
- Assemble your edible art:
- Place the oval body on parchment paper, brush the edge with water, then attach the head so it sticks. Arrange your feather and wing pieces around the body so it actually looks like a turkey in profile.
- Score and decorate with personality:
- Use a sharp knife or bread lame to carve feather details into your loaf, making it look textured and intentional. Press those olive eyes into place and fashion a little red wattle from a pepper piece or a tiny roll of dough.
- Give it final proof:
- Cover loosely and let it proof for 1 to 2 hours at room temperature until it feels slightly puffy but still has some spring left. You want it visibly bigger but not deflating or cracking at the seams.
- Get your oven ready:
- Preheat your oven to 450 degrees Fahrenheit with a baking stone or steel inside for at least 45 minutes so it's screaming hot. Hot stone equals oven spring equals gorgeous crust.
- Optional shine and texture:
- If you're using egg wash, brush it on gently right before baking and sprinkle seeds wherever you want them to catch the light. Skip this step entirely if you're keeping it vegan.
- Bake with steam first:
- Slide your parchment and turkey onto the preheated stone, then create steam by tossing ice cubes onto the oven floor or using a steam pan, and bake for 20 minutes. Steam keeps the crust stretchy while your bread expands, giving you maximum oven spring.
- Finish with gentle heat:
- Drop your oven temperature to 400 degrees and bake for another 20 minutes until your turkey is golden brown all over and sounds hollow when you tap the bottom. The color should be rich and inviting, not pale.
- Cool with anticipation:
- Let your turkey loaf cool completely on a wire rack before you slice into it, even though every fiber of your being wants to tear into it warm. This cooling time sets the crumb structure and makes slicing cleaner.
 Save
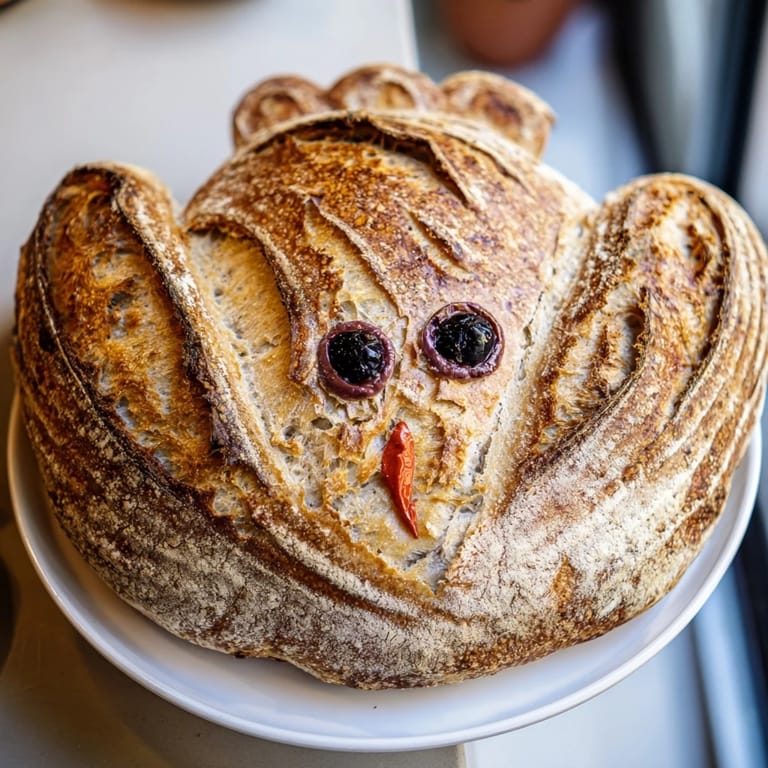
Save There's something almost magical about the moment when your shaping suddenly clicks and you step back and think, 'Wait, that actually looks like a bird.' I remember my hands covered in flour, laughing at how absurd the first attempt was, then getting serious and really committing to the form. By the fourth attempt I wasn't thinking anymore, just moving with the dough, and suddenly there it was.
The Science of Sourdough Fermentation
Sourdough isn't magic, but it sure feels like it when you understand what's actually happening. Those beneficial bacteria and wild yeasts in your starter are eating the flour, producing gas bubbles and organic acids that make your bread taste complex and tangy instead of one-note. The longer fermentation also breaks down the gluten and proteins, making the bread easier to digest and more nutritious, which is why sourdough has that reputation for being gentler on your stomach. When you stretch and fold, you're not just strengthening the dough, you're building a network of gluten strands that can hold all those gas bubbles and create that open, airy crumb that makes people swoon.
Why Shape Matters More Than You Think
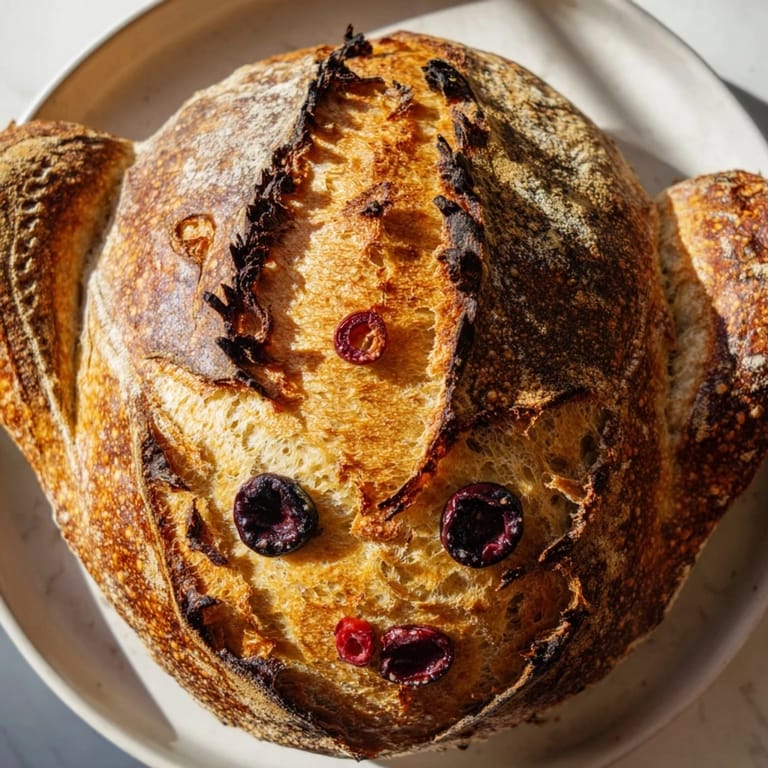
The shape of your loaf isn't just for looks, though the turkey absolutely stops conversations. How you form and position the dough affects how it bakes, where steam escapes, which parts get crunchier, and how the inside develops. A turkey shape is unusual enough that you get irregular crust colors and textures, which somehow makes it more beautiful and interesting than a perfectly round boule. I learned that every bump and crevice you create with shaping becomes a little crispy pocket that people fight over when slicing, so embrace the imperfections and let them be features, not flaws.
Making It Your Own
Once you nail the basic technique, this bread becomes a canvas for your own creativity and flavor ideas. I've added fresh rosemary and thyme to the dough itself, creating a bread that tastes herbaceous and complex, perfect for soup or serving with salads. You could experiment with different seeds for the topping, or use a combination of them to make the feathers look even more elaborate and colorful. Don't be afraid to adjust based on your kitchen's temperature, your starter's personality, or what you're in the mood for, because bread is forgiving in that way and rewards experimentation.
- Whole grain flours work but use them as 10 to 15 percent of your total flour, any more and your crumb gets dense instead of open.
- If your kitchen is cold, proof the final shape in your oven with just the light on, which creates a gentle 75 degree environment without turning it into an Easy-Bake oven.
- Always bake this on a stone or steel because it distributes heat evenly and gives you that shattered crust you're after, never skip this step.
 Save
Save This turkey loaf taught me that the best recipes are the ones that make people happy in multiple ways, through taste and through that moment of surprise and delight when they see what you've made. Every time you pull this from the oven, you get to feel that same small pride, and that's worth the time and attention it takes.
Cooking Q&A
- → How long does the fermentation process take?
The total fermentation spans 10-12 hours. This includes 30-45 minutes of autolyse, 2 hours of stretch and folds, 5-7 hours of bulk fermentation, and 1-2 hours of final proofing after shaping.
- → Can I make this dough without a sourdough starter?
Sourdough starter is essential for this dough's signature tangy flavor and texture. You'll need an active, healthy starter at 100% hydration. If you don't have one, you'll need to cultivate it 5-7 days before baking.
- → What's the best way to create steam in the oven?
Preheat a baking stone or steel thoroughly, then slide your shaped dough (on parchment) directly onto it. The hot stone creates immediate steam from the dough's moisture. Alternatively, place a hot cast-iron skillet on the oven floor and add hot water carefully for additional steam.
- → How do I score feather details without deflating the dough?
Use a sharp bread lame or knife held at a 45-degree angle. Make swift, confident cuts 1/4 inch deep into the dough surface. Score just before baking when the dough is fully proofed but still has tension to spring upward during baking.
- → Is this loaf suitable for vegan diets?
Yes, the base dough is naturally vegan. Simply omit the egg wash or substitute with plant milk brushed on before baking. Seeds for decoration are optional and naturally vegan, making this loaf fully compatible with vegan requirements.
- → How should I store this loaf after baking?
Cool completely on a wire rack before storing. Keep in a bread box or paper bag at room temperature for up to 3 days. For longer storage, slice and freeze for up to 3 months. Avoid plastic bags, which trap moisture and soften the crust.