 Save
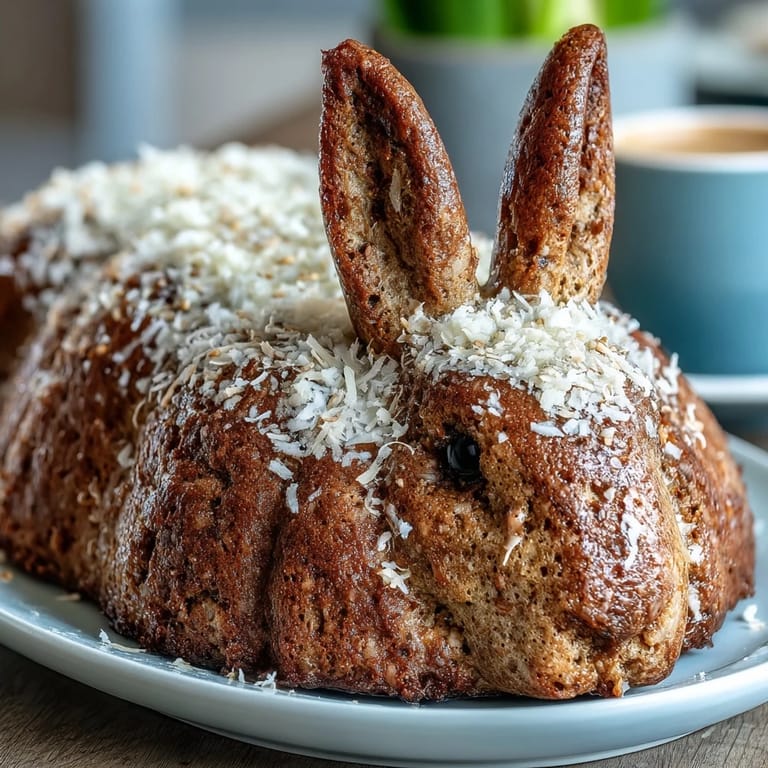
Save My daughter spotted this bunny cake in a magazine and wouldn't stop talking about it for weeks. When Easter finally rolled around, I decided to attempt the whole thing—the shapely ears, the coconut fur, those tiny marshmallow teeth—and somehow it all came together in a way that felt like pure kitchen magic. There's something about building a cake character piece by piece that makes you feel less like you're baking and more like you're sculpting edible joy. The moment she saw it sitting on the table, her eyes went wide, and I knew every slightly wobbly ear was worth it.
I made this for a small Easter brunch last year, and what struck me most wasn't the cake itself but watching my neighbor's shy toddler point at the bunny's face and say, 'It's smiling at me.' Suddenly, the imperfect ears and slightly lopsided nose felt intentional, like they gave the cake personality. That's when I realized this recipe works because it doesn't demand perfection—it celebrates whimsy instead.
Ingredients
- All-purpose flour (2 ½ cups): The foundation that keeps this cake tender without being dense; make sure it's spooned and leveled, not scooped straight from the bag, or you'll end up with a heavier crumb.
- Unsalted butter (1 cup, plus 1 cup for frosting): Use softened butter at room temperature so it creams properly with sugar, creating that light, airy texture that makes every bite melt on your tongue.
- Granulated sugar (2 cups): This isn't negotiable for the cake structure, but don't skimp on creaming time; three to four minutes of beating really does make a difference.
- Eggs (4 large, room temperature): Room temperature eggs incorporate more smoothly into the batter, preventing lumps and creating a more uniform crumb.
- Pure vanilla extract (1 tbsp, plus 1 tbsp for frosting): Real vanilla matters here because you can taste the warmth and depth it adds to an otherwise straightforward vanilla cake.
- Whole milk (1 cup): The moisture that keeps every layer tender even days later; don't swap it for a substitute without expecting slight texture changes.
- Baking powder (2 ½ tsp): This gives the cake its gentle rise and open, pleasant crumb structure.
- Powdered sugar (4 cups, sifted): Sifting really matters for frosting; lumps are annoying and almost impossible to smooth out once you start spreading.
- Sweetened shredded coconut (1 cup): This is what gives the bunny its furry texture and charm; press it firmly into the frosting while it's still soft.
- Pink gel food coloring: Gel coloring is more concentrated than liquid, so a tiny amount goes a long way for the ears and nose without thinning your frosting.
- Marshmallows (2 large, 2 mini): These become the cheeks and teeth, adding a playful dimension that makes the bunny feel alive.
- Black licorice laces or black gel icing: Either option works; use these for whiskers and eyes that give the bunny character and expression.
- Gold sprinkles: The finishing sparkle that catches light and makes the whole cake feel festive and special.
Tired of Takeout? 🥡
Get 10 meals you can make faster than delivery arrives. Seriously.
One email. No spam. Unsubscribe anytime.
Instructions
- Get your pans ready:
- Preheat the oven to 350°F (175°C) and grease and flour two 9-inch round cake pans thoroughly; use a paper towel to make sure the flour coats every edge and corner.
- Mix the dry team:
- Whisk together flour, baking powder, and salt in a medium bowl until they're evenly distributed; this aerates the flour slightly and ensures the baking powder spreads evenly throughout the batter.
- Cream the butter and sugar:
- In a large bowl, beat softened butter and granulated sugar together for about 3 to 4 minutes until it's pale, fluffy, and resembles thick frosting. This is when your kitchen will smell absolutely incredible, and it's tempting to stop early, but patience here directly affects cake texture.
- Add the eggs carefully:
- Add eggs one at a time, beating well after each addition so they fully incorporate into the creamed mixture. If you dump them all in at once, you risk the batter breaking or looking separated, which throws off the final texture.
- Flavor with vanilla:
- Mix in the vanilla extract until just combined and evenly distributed throughout the batter.
- Alternate wet and dry:
- Starting and ending with the flour mixture, add the dry ingredients and milk in alternating batches to the butter mixture, mixing only until each addition is combined. Overmixing at this stage develops gluten and can make the cake tough, so stop as soon as you don't see streaks of flour.
- Fill and bake:
- Divide the batter evenly between the prepared pans and bake for 30 to 35 minutes until a toothpick inserted in the center comes out clean or with just a few moist crumbs. Your kitchen will smell like vanilla heaven, and you'll be tempted to open the oven door constantly, but resist.
- Cool with patience:
- Let the cakes cool in their pans for 10 minutes, then turn them out onto wire racks to cool completely; rushing this step can cause them to crack or crumble when you unmold them.
- Make the frosting:
- Beat the softened butter until creamy, then gradually add the sifted powdered sugar a little at a time, alternating with milk and vanilla. Beat until the frosting is fluffy and spreadable; if it's too thick, add a touch more milk, and if it's too soft, add a bit more powdered sugar.
- Shape the bunny face:
- Place one cake round on your large serving platter as the bunny's face. Cut two oval shapes from the second cake round for the ears and use the remaining piece to form a small bowtie.
- Arrange the bunny:
- Position the ears at the top of the cake round and nestle the bowtie below, creating a clear bunny silhouette. Step back and look at it; this is the moment you realize you're really doing this.
- Apply the crumb coat:
- Spread a thin, even layer of buttercream over the entire bunny shape to seal in any loose crumbs. Chill in the refrigerator for 20 minutes so this layer sets slightly before you add the final thick frosting layer.
- Frost generously:
- Apply a thick, even final layer of buttercream over the entire cake, using an offset spatula to smooth it out and create a nice surface for decorations.
- Add the coconut fur:
- Press shredded coconut firmly onto all the frosted areas, working in sections so the coconut adheres well while the frosting is still soft. This is a bit messy and therapeutic at the same time.
- Color and place accents:
- Tint a small portion of shredded coconut with pink gel coloring by mixing it gently in a small bowl, then arrange it on the inner ears and around the nose area for those classic bunny details.
- Add facial features:
- Place large marshmallows on either side of the face for cheeks, mini marshmallows below for teeth, and use black licorice laces or black gel icing to create whiskers and eyes. This is when the bunny truly comes to life and suddenly feels less like cake and more like a character.
- Sparkle and finish:
- Sprinkle the gold sprinkles all over the bunny for that festive, shimmering final touch. Don't be shy with them; the sparkle is what makes this cake feel magical.
 Save
Save Last Easter, my niece helped me decorate this cake, and she took the whisker detail so seriously, measuring each licorice strand like she was performing surgery. When she finally stepped back and saw the finished bunny, she hugged me and said, 'You made this real.' That's the magic of this recipe—it transforms flour and butter into something that feels alive and intentional, something that becomes a memory just by existing on the table.
Why the Vanilla Cake Base Really Works
A lot of people think decorated cakes are all about the frosting and decorations, but the truth is, if your cake tastes bland or dry, no amount of gold sprinkles will fix it. This recipe uses a proper ratio of fat, sugar, and eggs to create a cake that's genuinely moist and flavorful on its own, not just a vehicle for sweetness. The creaming method—beating butter and sugar together—is what gives it that tender crumb that makes people actually want to eat it, not just admire it from afar. The vanilla extract adds warmth that ties everything together without being overpowering, and the milk keeps each layer soft even a day or two later.
Decorating as the Real Fun Part
Here's what nobody tells you about decorated cakes: the assembly is more fun than the baking. Once your cake has cooled and you've made your frosting, you get to play architect and artist at the same time, arranging pieces and deciding where the personality goes. The beauty of a bunny cake is that it's forgiving—slightly uneven ears look charming, and a crooked smile reads as friendly rather than as a mistake. You can involve kids, friends, or anyone with opinions about where the marshmallow cheeks should go, turning the kitchen into a creative space where baking becomes a shared experience rather than a solitary task.
Scaling and Storage Wisdom
If you're feeding more than twelve people, the best approach is to make two separate bunnies rather than trying to upscale one recipe, because managing a cake twice as big gets unwieldy quickly. This recipe is sized perfectly for a standard gathering, and the portions are actually satisfying without being overwhelming. For storage, keep the finished cake covered at room temperature for up to two days if your kitchen stays cool, or refrigerate it for up to five days; either way, it's best served at room temperature with a glass of sweet sparkling wine or fresh lemonade to cut through the richness of all that buttercream.
- If you want extra shimmer, edible gold leaf or edible gold dust makes the cake feel even more luxurious than standard sprinkles.
- A serrated knife works better than a straight knife when cutting the second cake round into ear and bowtie shapes.
- Don't panic if your bunny looks slightly wonky before decorating; the frosting and coconut cover a multitude of imperfections and add charm.
 Save
Save This cake has a way of turning ordinary spring gatherings into something memorable and joyful. Whether it's for a child's Easter party or a casual brunch with friends, the effort you put in shows, and people will remember it.
Cooking Q&A
- → How do I achieve the bunny shape?
Cut one cake round into the bunny face, then cut ovals from the other round to form ears and a bowtie. Arrange on a platter before frosting.
- → What gives the cake its sparkling finish?
Gold sprinkles are applied on top to create a shimmering, festive look that enhances the cake’s visual appeal.
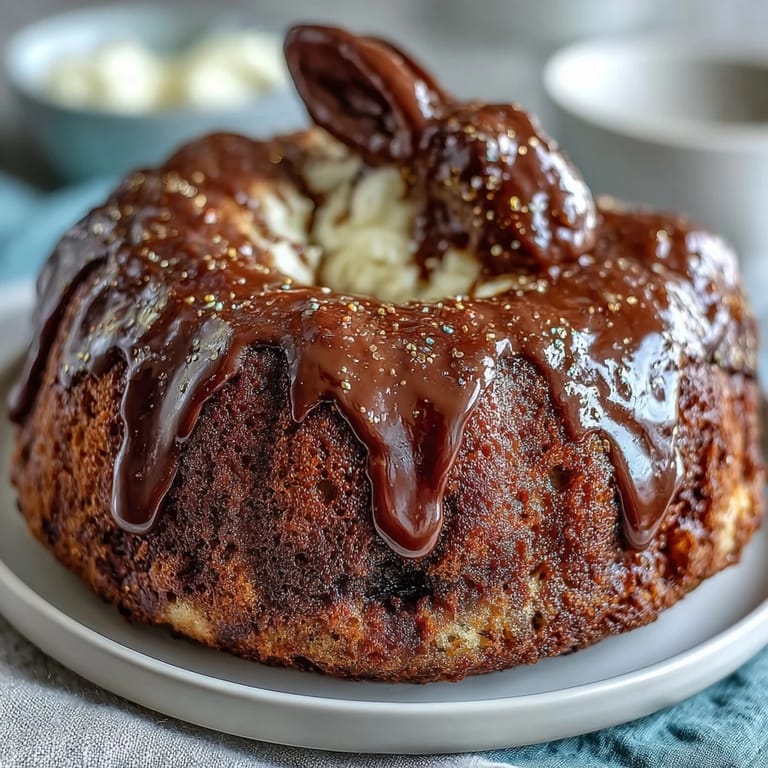
- → Can I substitute ingredients for flavor variations?
Yes, for a chocolate variation, replace half a cup of flour with unsweetened cocoa powder without altering the texture significantly.
- → How is the buttercream made smooth and fluffy?
Beat softened butter until creamy, then gradually add powdered sugar, milk, vanilla, and a pinch of salt, continuing to beat until light and smooth.
- → What decorations create the bunny's features?
Shredded coconut forms the fur, Pink tinted coconut for ears and nose, marshmallows for cheeks and teeth, and black licorice or gel icing for whiskers and eyes.
- → How should the cake be stored after preparation?
Store covered at room temperature for up to 2 days or refrigerate up to 5 days to maintain freshness and texture.