 Save
Save Every year when Memorial Day rolls around, I find myself compelled to make something bright and playful for the table. One spring, as the smell of freshly cut grass floated through the screen door, I decided to whip up a cake that would capture the holiday's festive spirit in every slice. The swirls of red and blue, pooled in the tender white cake, felt like an easy, edible way to join the celebration. I still remember the satisfaction of seeing that first cross-section reveal its firework of colors, and hearing an oh wow ripple from the kitchen. There's just something about this cake that always puts people in a party mood.
The first time I brought this cake to a backyard picnic, the kids hovered around, curious about the colors peeking through the whipped topping. By the time the sun set, I had given out the recipe on napkins and paper plates more times than I could count. Watching everyone compare their pieces to see which color swirled further, I realized how food can spark so much laughter and conversation. Even my neighbor, who claims to be 'not a dessert person,' left with an extra slice wrapped in foil. That night, bits of confetti and sticky berry juice told the story of the cake's success before the empty pan did.
Ingredients
- White cake mix (1 box, 15.25 oz): I prefer the boxed kind for this because it comes out fluffy and takes on the jello colors perfectly, but try to use one with a neutral flavor and double-check for hidden dairy if you're serving mixed company.
- Water (1 cup): Room temperature water melds the batter smoothly; too cold and you might get little clumps.
- Vegetable oil (1/2 cup): A neutral oil keeps the cake tender and lets the colors shine; I've tried it with canola and it works, but stick with what's familiar.
- Large eggs (3): Crack them into a separate bowl in case of shell accidents—I've learned the hard way that fishing out bits of shell slows things down.
- Strawberry or cherry-flavored gelatin (1 box, 3 oz): I love the tart punch of cherry, but strawberry gives a candy-sweet touch—either creates that festive red stripe.
- Berry blue gelatin (1 box, 3 oz): The blue is half the fun; if you can't find it, lemonade and a few drops of blue food dye work in a pinch.
- Boiling water (2 cups, divided): Pour slowly when mixing with the gelatin or it’ll splash everywhere; I use my kettle for even heat.
- Cold water (2 cups, divided): Essential for setting the gelatin without melting the cake's edges; don't skip this step.
- Frozen whipped topping (8 oz tub, thawed): Spreading a cold, fluffy layer gives such a smooth finish, but give it a gentle stir first in case it's icy around the edges.
- Red, white, and blue sprinkles (2 tbsp): There's no such thing as too many, and the kids love helping with this part—let them go wild.
- Fresh strawberries and blueberries (optional): For a big reveal, add berry clusters before serving; they bring a little extra tartness and juiciness to the mix.
Tired of Takeout? 🥡
Get 10 meals you can make faster than delivery arrives. Seriously.
One email. No spam. Unsubscribe anytime.
Instructions
- Get the oven and pan ready:
- Preheat your oven to 350°F (175°C) and grease a 9x13-inch baking dish, making sure to get the corners so nothing sticks.
- Mix and bake the cake:
- Combine the white cake mix, water, oil, and eggs in a mixing bowl, then beat until smooth—listen for the thick, sticky sound that signals everything's blended. Pour the batter into your prepared pan and bake for 28–32 minutes until a toothpick poked in the center comes out clean.
- Cool and poke:
- Once baked, rest the cake on the counter for about 15 minutes. Using the handle of a wooden spoon, gently poke holes about every inch—it feels deeply satisfying, almost like bubble wrap.
- Make the gelatin colors:
- In separate bowls, dissolve the red gelatin in 1 cup boiling water, then mix in 1/2 cup cold water; repeat for blue gelatin. The steam and candy smell will fill your kitchen—just don't inhale too deeply near the bowls.
- Color the cake:
- Carefully pour the red gelatin over half the holes and blue over the rest, watching them seep into the sponge. Slide the cake into the fridge for at least 2 hours so the stripes can set.
- Frost and decorate:
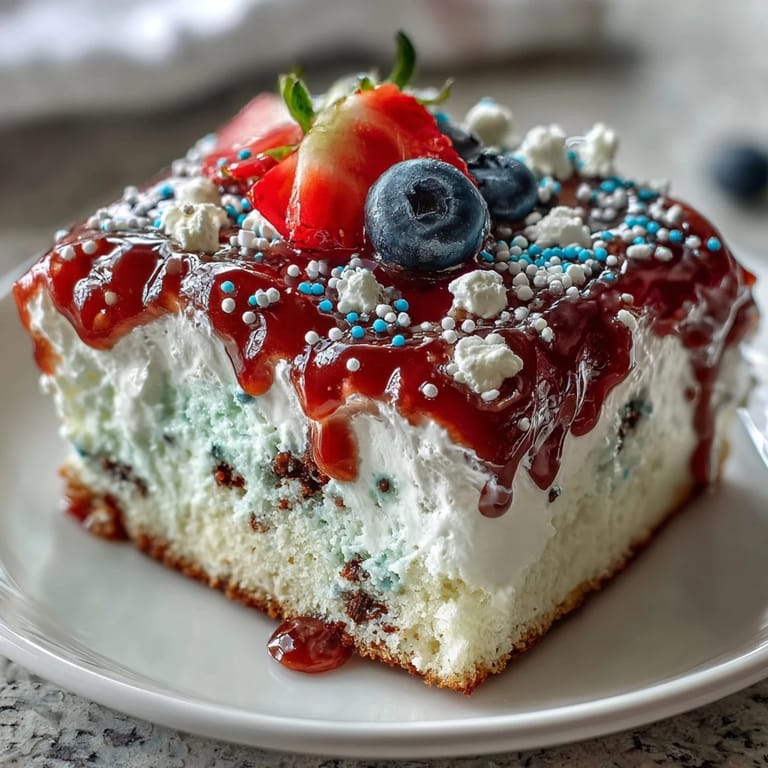
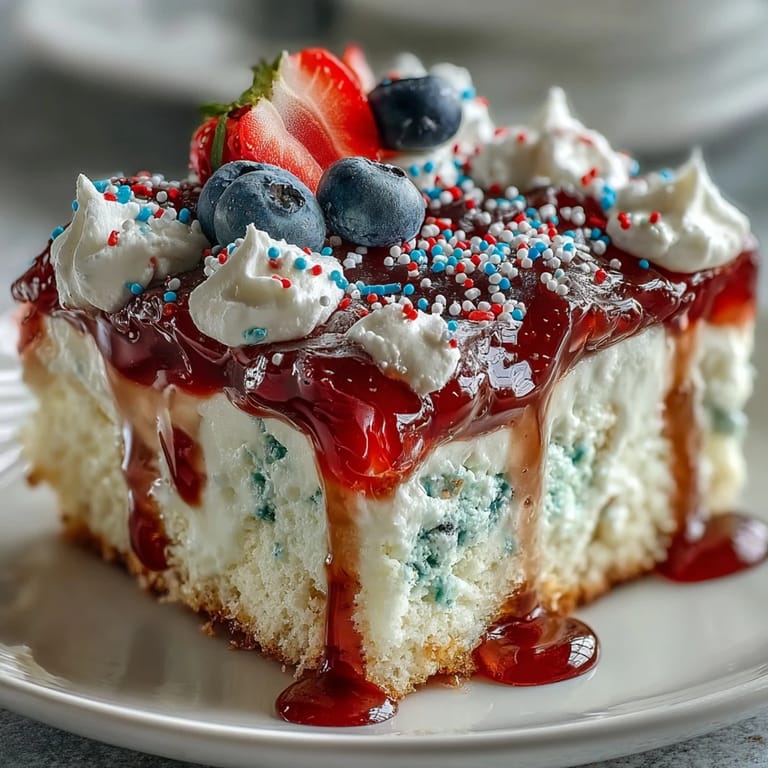
- After chilling, spread the thawed whipped topping across the surface in a pillowy layer. Sprinkle generously with red, white, and blue sprinkles, and adorn with fresh berries for a final burst of color.
- Slice and serve:
- Cut the chilled cake into squares and serve up the most festive slices—be ready for requests for seconds.
 Save
Save  Save
Save It’s funny how this cake once turned a rainy Memorial Day indoors into its own celebration: we ended up laughing over who managed the 'patriotic' bite with all three colors, and the kids gave standing ovations for the prettiest slices. Somehow, the cake became a centerpiece more memorable than any big grill-out that day.
Making It Your Own
After a few tries, I realized this cake is endlessly customizable. Some friends have swapped in raspberry or lemon gelatin, while others stir a handful of white chocolate chips into the batter for fun surprises. No matter what, using flavors that evoke your favorite summer fruits makes each batch feel personal.
How to Serve the Prettiest Slices
I like to chill the cake an extra hour if I have time, since the stripes show up brilliantly when slicing cold. Using a clean, sharp knife for each cut keeps edges crisp and avoids dragging colors through the cake, so have a damp cloth nearby. A dollop of whipped topping and a cluster of berries on each plate turns every serving into a little work of art.
The Clean-Up and Quick Tricks
With all the fun comes a little mess—jello dots and sprinkles everywhere—but lining the baking pan with parchment helps so much when you want flawless slices. I’ve learned to let the kids do the decorating but pour the gelatin myself to dodge sticky disasters. If you're short on time, use prepped berries and let the cake chill in the coolest part of your fridge.
- Lay down a baking sheet under your pan to catch errant sprinkles.
- Chill your serving plates so the whipped topping doesn't melt too soon.
- Save a few extra sprinkles to touch up each plate right before serving.
 Save
Save  Save
Save This poke cake always turns an ordinary gathering into a celebration, no matter the weather or the crowd. Set it out and watch as the colors—and smiles—steal the show.
Cooking Q&A
- → What pan size should I use?
Use a 9x13-inch baking dish for even baking and the right hole distribution. The batter depth and gelatin placement work best in this size.
- → How long should the cake chill after adding gelatin?
Chill for at least 2 hours, or until the gelatin is fully set. Longer chilling firms the texture and makes slicing cleaner.
- → Can I use fresh berries instead of sprinkles?
Yes. Fresh strawberries and blueberries make a bright garnish; add them just before serving to avoid releasing extra moisture onto the topping.
- → How do I prevent the colors from bleeding together?
Pour the two gelatin flavors carefully into separate hole areas and avoid overfilling. Allow the cake to sit briefly before refrigerating so the gelatin starts to settle.
- → Can I substitute gelatin flavors?
Absolutely. Swap in other red and blue gelatin flavors to match your taste, keeping the same dissolution method of boiling then adding cold water.
- → Are there allergy-friendly swaps?
Check labels for eggs, wheat, and milk. Use egg-free cake mix and dairy-free whipped topping alternatives if you need to avoid those allergens.