 Save
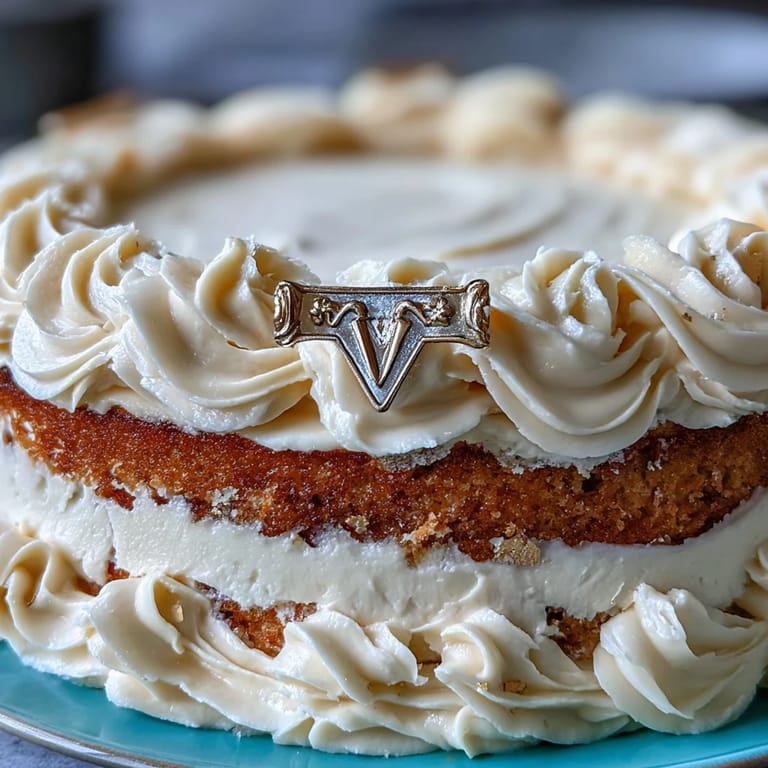
Save My sister stood in the kitchen doorway, diploma in hand, and I knew exactly what I needed to bake. There's something about marking those milestone moments with cake—not just any cake, but one that feels as special as the person graduating. This vanilla sponge with its delicate crumb and silky buttercream became my go-to because it's elegant enough to impress but forgiving enough that even when my piping skills fail, the gold foil saves the day. The first time I made it, I was nervous the buttercream would break, but something about the slow addition of sugar and the patience it required felt like the right way to celebrate.
I'll never forget frosting this cake at midnight the night before my nephew's graduation party, the kitchen quiet except for the mixer whirring and my coffee growing cold on the counter. My hands were shaky from caffeine and emotion, honestly—watching him graduate felt bigger than just baking a dessert. When I carefully placed that gold foil on the warm frosting and it caught the kitchen light, I understood why people fuss over these details. It wasn't vanity; it was love made visible.
Ingredients
- All-purpose flour (2 ½ cups): The backbone of a tender crumb—make sure it's measured by spooning and leveling, not scooping straight from the bag, or you'll end up with a dense cake that feels heavier than the moment deserves.
- Baking powder (2 ½ tsp): The silent hero that gives this cake its gentle rise and airy texture; don't skip checking the expiration date or your cake will be flat.
- Unsalted butter (1 cup for cake, 1 ½ cups for frosting): Room temperature is non-negotiable here—cold butter won't incorporate properly and you'll be mixing forever, defeated.
- Granulated sugar (2 cups): This creams with the butter to trap air bubbles, which is what makes the cake tender and cloud-like.
- Eggs (4 large): Room temperature eggs emulsify smoothly into the batter; cold ones seize up and create lumps that no amount of beating fixes.
- Vanilla extract (1 tbsp for cake, 2 tsp for frosting): The unsung flavor that transforms ordinary butter and sugar into something worth remembering.
- Whole milk (1 cup): Adds moisture and richness; room temperature milk prevents the batter from cooling down and separating.
- Powdered sugar (5 cups): Sift it before adding or accept tiny lumps in your otherwise silky frosting—learned that lesson the messy way.
- Edible gold foil sheets: Handle with completely dry hands or tweezers; moisture is their enemy and yours.
- Diploma topper: Store-bought or fondant homemade, this becomes the focal point that ties everything together into a clear celebration.
Tired of Takeout? 🥡
Get 10 meals you can make faster than delivery arrives. Seriously.
One email. No spam. Unsubscribe anytime.
Instructions
- Prepare your stage:
- Preheat the oven to 350°F and line two 9-inch round pans with parchment paper—greasing first helps the paper stick. This is your moment to slow down and set yourself up for success, because rushing this part means cake sticking where it shouldn't.
- Combine the dry ingredients:
- Whisk flour, baking powder, and salt together in a medium bowl until they're evenly distributed. This pre-mixing prevents streaks of baking powder in your finished cake.
- Cream butter and sugar until clouds form:
- Beat them together for 3 to 4 minutes on high speed until the mixture is pale, fluffy, and noticeably lighter in color and volume. This step is doing the work of trapping air, which becomes the lift in your cake.
- Add eggs one by one with patience:
- After each egg, beat for about 30 seconds to fully incorporate it before adding the next. Rushing this creates a broken-looking batter that won't bake evenly.
- Stir in vanilla:
- A single tablespoon transforms everything, so don't skip it or minimize it.
- Alternate between flour and milk, beginning and ending with flour:
- Add roughly a third of the flour mixture, beat gently until combined, then add half the milk, mix, then the remaining flour, mix, then remaining milk, and finally the last bit of flour. Doing it this way prevents the batter from becoming thin and deflated.
- Divide and smooth:
- Distribute the batter evenly between pans using an offset spatula to level the tops so they bake at the same rate.
- Bake until the toothpick test passes:
- Bake for 28 to 32 minutes until a toothpick inserted in the center emerges clean or with just a crumb or two clinging to it. Oven temperatures vary wildly, so start checking at 25 minutes if yours runs hot.
- Cool with intention:
- Let cakes rest in their pans for 10 minutes—this allows them to set just enough to handle—then turn out onto wire racks to cool completely. Frosting warm cake causes the frosting to melt and slide everywhere.
- Build the buttercream base:
- Beat softened butter on high speed for 3 minutes until it's pale and creamy, almost mousse-like. Then gradually add the sifted powdered sugar a cup at a time, scraping the bowl between additions, until it reaches a thick paste stage.
- Smooth it out with liquid and flavor:
- Add vanilla, a pinch of salt, and milk or heavy cream a tablespoon at a time until the frosting reaches a spreadable consistency that peaks gently when you lift the beater. Too thick and you'll tear the cake layers; too thin and it won't hold up the decoration.
- Assemble with a crumb coat:
- Level the cake layers if the tops domed, place one on a serving plate, spread a thin layer of buttercream on top, then place the second layer. This base layer is your insurance against crumbs showing up in your final frosting coat.
- Chill the crumb coat:
- Refrigerate for 30 minutes so the crumb coat sets and creates a barrier against loose crumbs migrating into your final coat.
- Apply the final frosting:
- Using an offset spatula, apply a smooth, generous layer of buttercream all over the cake, working in long, confident strokes. This is where patience matters—smooth frosting is the canvas for what comes next.
- Apply gold foil with reverence:
- Using clean, dry tweezers or fingertips, carefully press small sheets of edible gold foil onto the frosting in clusters or abstract patterns that catch the light. The foil is delicate, so handle it like you mean it—jerky movements tear it, but gentle placement makes it luminous.
- Crown it with the diploma:
- Place your topper at the center or slightly off to one side, ensuring it's secure and level. Step back and look—you've created something that says, 'This moment matters.'
- Final chill and serve:
- Refrigerate for a brief 15 minutes to set everything, then bring to room temperature 30 minutes before serving so the buttercream is soft and the flavors bloom. Cold cake tastes muted; room temperature cake sings.
 Save
Save Watching my cousin cut into this cake at her graduation party, surrounded by people she loves, I realized it wasn't about the gold foil or the perfect frosting. It was about showing up in the kitchen at midnight because someone you care about deserves to be celebrated. That's when baking stops being about technique and becomes about presence.
Flavor Variations That Still Shine
This vanilla base is remarkably adaptable, which is why I keep coming back to it. Add a teaspoon of almond extract to the batter for subtle depth, or infuse the milk with lemon zest by letting it steep for an hour before mixing. For a chocolate lover's graduation, swap half a cup of flour for cocoa powder and increase the milk slightly. The buttercream can be tinted with gel food coloring to match school colors—I once made lavender and gold for a graduation that felt truly personal. Every variation I've tried has held its structure and elegance.
The Decoration Details That Transform It
The edible gold foil is where this cake transcends ordinary and becomes a statement. I've applied it in geometric patterns, scattered it like confetti, and even outlined the entire cake for a formal look. The key is letting the frosting set just slightly so the foil adheres without sinking in. If you're feeling ambitious, make a fondant diploma topper from scratch using edible markers—it takes an extra 30 minutes but becomes fully edible and infinitely more impressive.
Timing and Make-Ahead Strategies
I've baked this cake the morning of a party and frosted it that evening with great success; the sponge actually gets more tender as it sits. The buttercream can be made a full day ahead and refrigerated, then softened at room temperature before spreading. The assembled cake holds beautifully in the refrigerator for up to 24 hours before serving, though I add the gold foil and topper within a few hours of the celebration so everything looks fresh and intentional.
- Bake cakes up to two days ahead and wrap them tightly in plastic wrap to lock in moisture.
- Make buttercream the day before and bring it to room temperature for 30 minutes before using—it'll spread like silk.
- Apply edible gold foil and toppers within 2 to 3 hours of serving for the most luminous, picture-perfect result.
 Save
Save This cake has become my celebration go-to because it never disappoints and it tastes as good as it looks. Bake it with pride—you're creating a moment worth remembering.
Cooking Q&A
- → How do I achieve a moist vanilla sponge?
Ensure eggs and milk are at room temperature, and avoid overmixing the batter to keep the sponge tender and moist.
- → What’s the best method for adding edible gold foil?
Use dry hands or tweezers to gently apply the gold foil to the cooled, frosted cake to avoid tearing.
- → How can I make the diploma topper edible?
Create the topper from fondant and decorate with edible markers for a fully edible embellishment.
- → Can I customize the frosting color?
Yes, use gel food coloring in the buttercream to match school colors without affecting texture.
- → What are suitable beverage pairings for this dessert?
Sparkling cider or champagne complement the cake’s richness and add a festive touch to celebrations.