Save
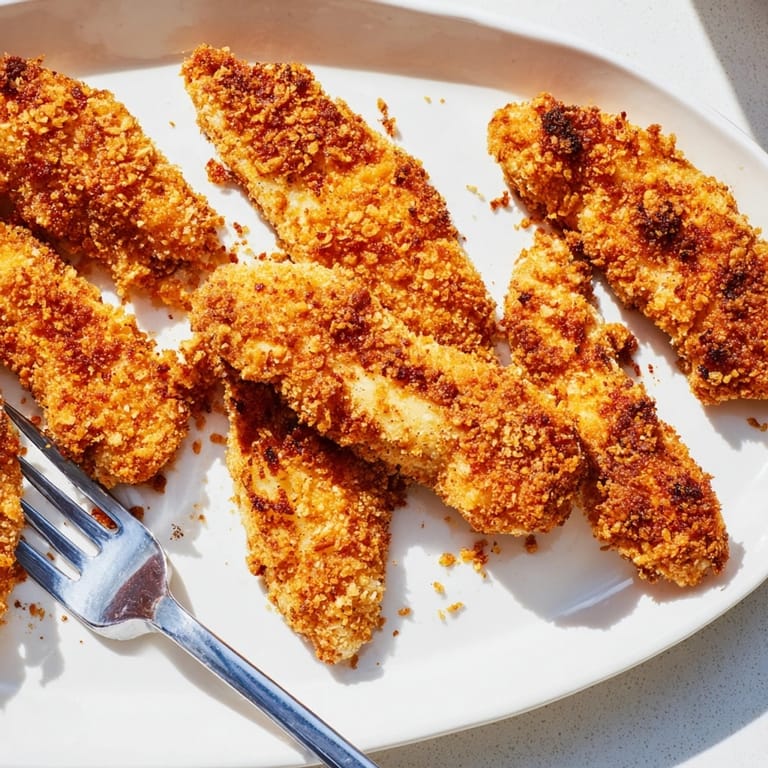
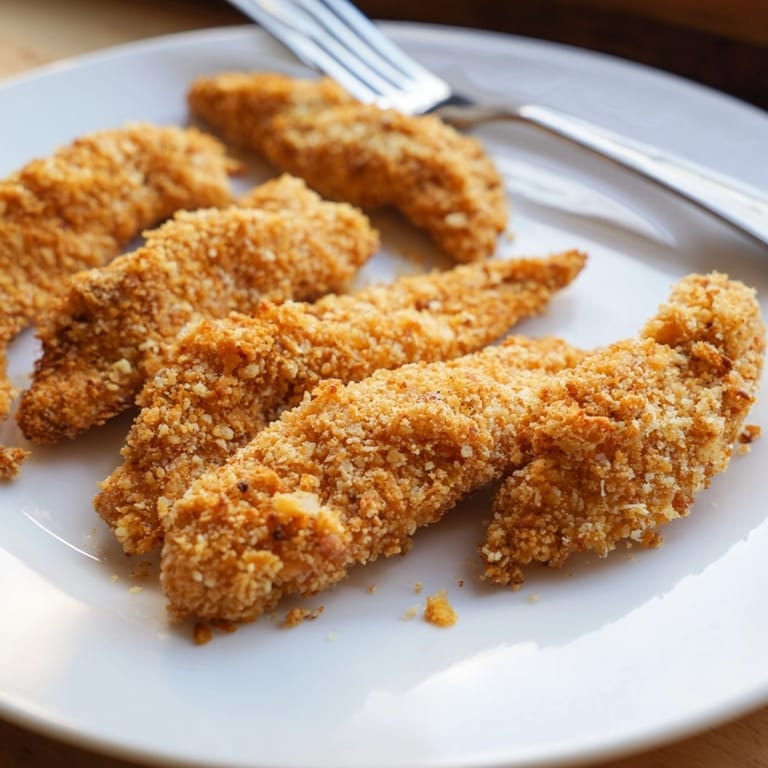
Save Nothing beats that first bite into these crispy baked chicken tenders crunchy shell with juicy chicken inside Every batch brings back memories of weeknight dinners where my kids would race each other for the best-looking piece Simple to make and always a crowd-pleaser these tenders deliver fried flavor without the mess or extra oil
My own family never gets tired of these I once made them for a soccer team party and there were not a single crumb left on the tray Serving them fresh and hot always earns me major points
Ingredients
- Chicken strips or tenders: Choose boneless skinless chicken that feels firm and has a pink color for juiciness and tenderness
- Panko breadcrumbs: These give that signature airy crunch Look for Japanese panko which crisps better than regular breadcrumbs
- Cornflakes: Crushed corn cereal adds serious crunch and a touch of sweetness Choose unsweetened and crush by hand for best results
- Garlic powder: This amps up the savory notes Freshness is key so check the date on your jar
- Paprika: Adds a smoky color and a gentle warmth Opt for bright red Spanish paprika for more depth
- Salt: Enhances all those delicious flavors Use fine sea salt so it sticks well to the coating
- Black pepper: Freshly ground means you get bigger flavor and gentle heat
- Large eggs: They help the coating stick and add richness Use free-range eggs for brighter yolks
- Milk: A splash makes the dredge smooth and gives a nice golden coating Whole or two percent both work well
- Olive oil spray or olive oil: Keeps the exterior crisp without frying Look for extra virgin for best flavor
Tired of Takeout? 🥡
Get 10 meals you can make faster than delivery arrives. Seriously.
One email. No spam. Unsubscribe anytime.
Instructions
- Preheat the Oven:
- Set your oven to 425 Fahrenheit which creates that high heat for a golden crunchy coating Line a baking sheet with parchment or grease it well to prevent sticking
- Make the Breading Mixture:
- In a wide bowl combine panko breadcrumbs crushed cornflakes garlic powder paprika salt and pepper Stir until everything looks evenly mixed and there are no clumps of seasoning
- Prepare the Dredge:
- Crack the eggs into a second bowl and add milk Whisk until the mixture is completely smooth and light yellow with no streaks of egg white
- Pat the Chicken Dry:
- Lay the chicken strips on a clean towel or paper towel and pat firmly on all sides Dry chicken helps the coating grab on and get extra crispy while baking
- Coat the Chicken:
- Drop each chicken strip into the egg mixture making sure it is fully coated Then lift it out and press it in the breadcrumb mixture Press gently with your fingers to help as much breading stick as possible
- Arrange on Baking Sheet:
- Place each breaded strip on your prepared baking sheet Do not crowd them or they may steam not crisp up If you want extra crunch lightly mist or drizzle the tenders with olive oil
- Bake and Flip:
- Bake in the hot oven for 18 to 20 minutes After 10 minutes use tongs to gently flip each tender so both sides brown evenly Check for a deep golden color and crisp texture
- Check Doneness and Rest:
- Test the thickest piece for doneness Your chicken is ready when you see juices run clear and an internal thermometer reads 165 Fahrenheit Let the tenders sit for a couple of minutes so the juices settle before serving
 Save
Save My favorite part is the crunch you get from the mix of panko and crushed cornflakes Every time the aroma fills the kitchen it takes me back to big Sunday family lunches where everyone crowded around the pan waiting for their turn to eat a fresh crispy strip
Storage Tips
Store leftovers in an airtight container in the refrigerator and they stay crisp for up to two days For the best texture reheat on a sheet tray at 375 Fahrenheit instead of the microwave to bring back that crunch
Ingredient Substitutions
If you are out of cornflakes double up on panko and sprinkle in a teaspoon of grated Parmesan Cheese For a different flavor try seasoned Italian breadcrumbs or swap in gluten-free cereal and crumbs for allergies
Serving Suggestions
Dip these tenders in classic sauces like ranch or honey mustard Serve alongside sweet potato fries or over a big green salad Kids love them tucked in mini sliders or wraps with lettuce and mayo For parties cut them into bite-size pieces and spear with toothpicks
Cultural Context
Chicken tenders became a staple in American kitchens in the late twentieth century Their popularity soared because they delivered that satisfying crunch without any bones making them especially friendly for kids and casual family dinners This baked version lets you relive that nostalgia with less guilt and just as much flavor
Seasonal Adaptations
In spring serve these tenders over a bright pea and mint salad In autumn pair them with roasted squash wedges and apple slaw During summer they are perfect picnic food just chill and pack them with portable dipping sauces
Success Stories
Whenever I have made these for family potlucks they vanish before the speeches even start I have received requests for the recipe from neighbors who are usually fried chicken purists The secret is letting the breading soak in before baking it is worth the extra few minutes
Freezer Meal Conversion
Bread the uncooked tenders and freeze them in a single layer on a sheet tray Once frozen transfer to a zip-top bag and store for up to two months Bake straight from frozen adding an extra five minutes to the cooking time and check for doneness at the end
 Save
Save Enjoy every crispy bite with your favorite dip and savor the crowd-pleasing crunch at your next dinner Enjoy
Cooking Q&A
- → How do I get the coating really crispy?
Use panko and crushed cornflakes, and spray or drizzle with olive oil before baking for extra crunch.
- → Can I make these gluten-free?
Yes, substitute gluten-free breadcrumbs and cornflakes in the coating mixture for a gluten-free option.
- → What sauce goes well with these tenders?
Try honey mustard, ranch, barbecue, or ketchup as tasty dipping sauces to complement the flavor.
- → How do I know when they are done?
Bake until golden and the internal temperature reaches 165°F (74°C). The coating should look crisp and browned.
- → Can I prepare these ahead of time?
Yes, bread the chicken strips and refrigerate them for up to 4 hours before baking when ready.
- → Can I make them spicy?
Add a pinch of cayenne or your preferred hot spice to the breading for a spicy kick.