 Save
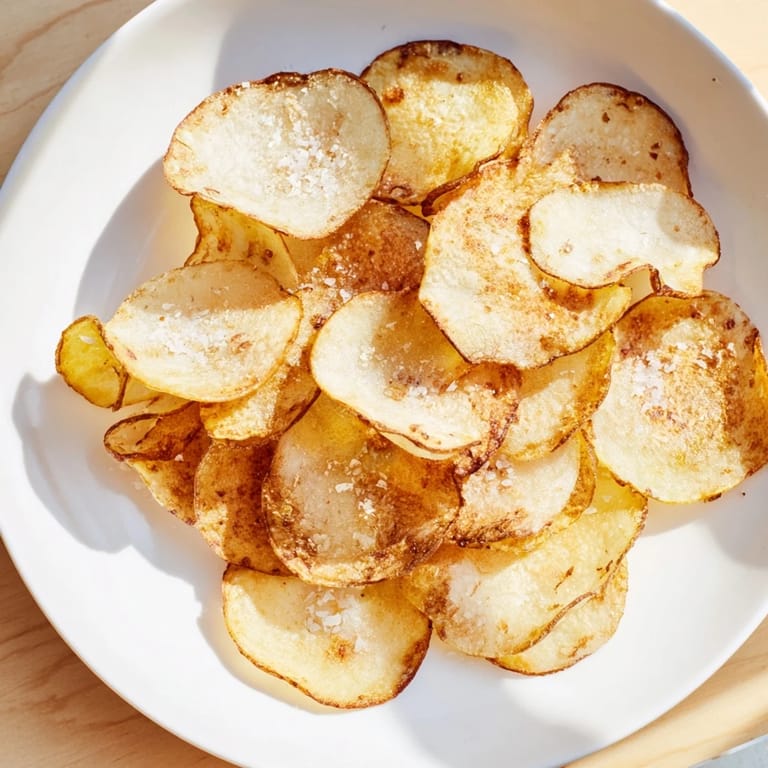
Save I discovered the magic of air-fryer potato chips on a lazy Saturday afternoon when I was desperately hunting for something to munch on between lunch and dinner. My kids were hovering around the kitchen, and instead of reaching for a bag of store-bought snacks, I grabbed two russet potatoes and wondered aloud if we could make chips at home. Twenty minutes later, we had golden, shattering-crispy chips that tasted nothing like the greasy bag versions I'd grown up with—just pure potato, oil, and a whisper of salt. That moment changed how I thought about snacking entirely.
My friend Sarah came over one evening just as I was pulling a batch out of the air fryer, and the smell alone stopped her in her tracks. She grabbed one without asking and went quiet for a moment—the kind of quiet that means something just became her favorite thing. We ended up making three batches that night while sitting on the kitchen counter, talking about life and sneaking chips faster than we could cool them. That's when I realized these chips had become my secret weapon for making people feel at home.
Ingredients
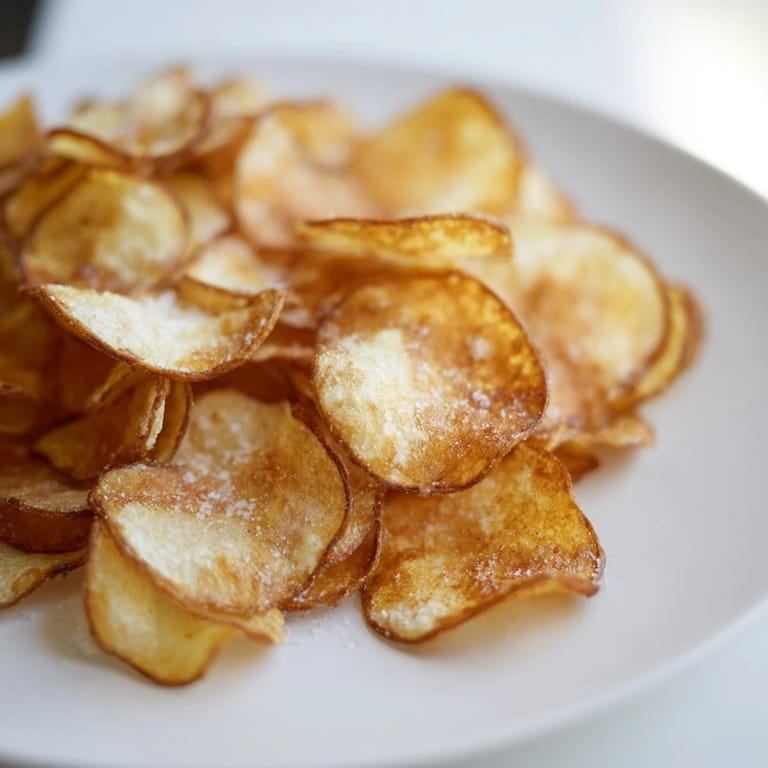
- 2 large russet potatoes: The starch content in russets makes them absolutely golden and crispy—don't skip this variety or you'll lose that signature crunch that makes the whole thing worth doing.
- 1 tablespoon olive oil: Just enough to coat the slices and help them crisp up, without making your chips greasy or heavy.
- ½ teaspoon fine sea salt: The fine grind dissolves and seasons evenly, unlike coarse salt which can create bitter pockets.
- ¼ teaspoon freshly ground black pepper (optional): If you use it, grind it fresh right before tossing—pre-ground pepper tastes flat by comparison.
- ¼ teaspoon smoked paprika (optional): A pinch adds warmth and depth without overpowering the pure potato flavor you worked to achieve.
Tired of Takeout? 🥡
Get 10 meals you can make faster than delivery arrives. Seriously.
One email. No spam. Unsubscribe anytime.
Instructions
- Slice your potatoes paper-thin:
- Scrub the potatoes well under cold water, and peel them if you prefer (I keep the skin on for extra texture and nutrients). Using a mandoline set to about 1.5 mm will change your life here—the consistency is what separates chips from disappointing thick wafers. If you're using a knife, go slowly and let the blade do the work.
- Soak out the starch:
- Drop those slices into a big bowl of cold water and let them sit for a full 10 minutes—this step removes the excess starch that would otherwise make chips gummy instead of crispy. It feels like a small thing, but it's actually the difference between good chips and chips that shatter gloriously in your mouth.
- Dry thoroughly:
- Pat every slice dry with paper towels like your life depends on it. Any lingering water will steam the chips instead of crisping them, so don't rush this part.
- Coat with oil and seasoning:
- Toss the dried slices in a bowl with olive oil, salt, and whichever optional seasonings you've chosen. Make sure every piece gets touched by the oil—this helps them brown evenly and crisp up all over.
- Preheat your air fryer:
- Set it to 180°C (360°F) and let it warm up for 3 minutes. This matters more than you'd think; a properly heated air fryer means better browning from the first minute.
- Arrange and air fry:
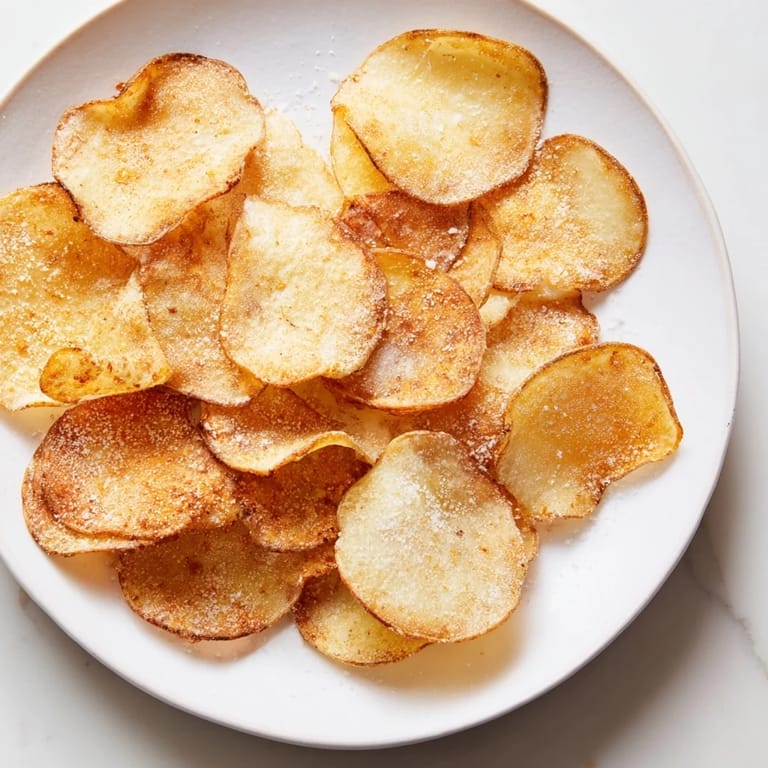
- Spread the potato slices in a single layer in the basket, working in batches so nothing overlaps—crowding the basket is the fastest way to steam instead of crisp. Cook for 8 minutes, then open it up, flip or shake the basket to turn everything over, and cook another 6 to 8 minutes until the chips are golden and crackle when you touch them.
- Cool on a rack:
- Transfer the chips to a wire rack immediately and resist the urge to eat them for at least a minute or two. They continue crisping as they cool, and that final stage is where the magic really happens.
 Save
Save There's something almost meditative about standing at the counter with a mandoline, slicing potato after potato into these thin, uniform rounds. I started paying attention to the rhythm of it one afternoon, and realized I was actually enjoying the prep work instead of just rushing through it. That shift—from treating it as a chore to savoring the process—somehow made the chips taste even better when they finally came out of the air fryer.
Choosing Your Potatoes
Russet potatoes are the gold standard here because of their higher starch content and fluffy interior, but I've had great success with Yukon Gold potatoes too—they're a bit waxy and produce chips with a slightly different texture, almost buttery in comparison. Red potatoes have too much moisture and tend to stay soft even when cooked longer, so I'd skip those unless you want something more like a crispy chip-slice hybrid. The key is picking a potato that's firm and doesn't have soft spots or sprouting eyes, which tells you the potato has aged in storage and lost some of its crispness potential.
Seasoning Adventures
Once you nail the basic salt-and-pepper version, the real fun starts. I've scattered garlic powder, onion powder, chili powder, smoked paprika, and even a tiny pinch of cayenne on different batches, and every single one tastes like a completely different snack. The trick is to add any dry seasonings before the air frying so they stick to the oil coating and don't just fall off halfway through cooking. Fresh herbs like dried dill or rosemary can work too, though they brown faster than you'd expect, so watch the first batch carefully.
Storage and Making Them Last
Homemade chips are best eaten within a few hours of cooling—that's just the truth of it. After that, they start to soften as they absorb moisture from the air, even in an airtight container. If you do have leftovers, store them in an airtight container at room temperature for up to 2 days, and you can bring back some of their crispness by popping them in a 120°C oven for a minute or two. I've found that making chips in smaller batches throughout the week beats making a huge batch upfront and watching it slowly get soggy—plus, the kitchen smells amazing every single time.
- Keep your airtight container in a cool, dry place away from direct sunlight or heat sources.
- If you're meal-prepping, slice and soak your potatoes the night before, then dry and air-fry them fresh when you want them.
- The mandoline is worth the counter space—it makes slicing so consistent that your chips cook evenly every time.
 Save
Save Making chips at home feels like a small rebellion against convenience foods, but it's really just about giving yourself permission to have something fresher and better. They're simple enough for a weeknight snack run but special enough to put out when people come over.
Cooking Q&A
- → What type of potatoes work best?
Russet potatoes are ideal for their starch content and crisp texture, though Yukon Gold can also be used for a slightly different flavor and texture.
- → Why soak the potato slices in cold water?
Soaking removes excess starch, which helps the chips become crispier when air fried.
- → How thin should the potato slices be?
Slices about 1.5 mm thick ensure even cooking and the right crunch; a mandoline slicer helps achieve consistent thinness.
- → Can I add different seasonings?
Yes, garlic powder, chili powder, or smoked paprika can be sprinkled before cooking to add unique flavors.
- → How do I store leftover chips?
Once fully cooled, store chips in an airtight container for up to two days to maintain freshness and crispness.